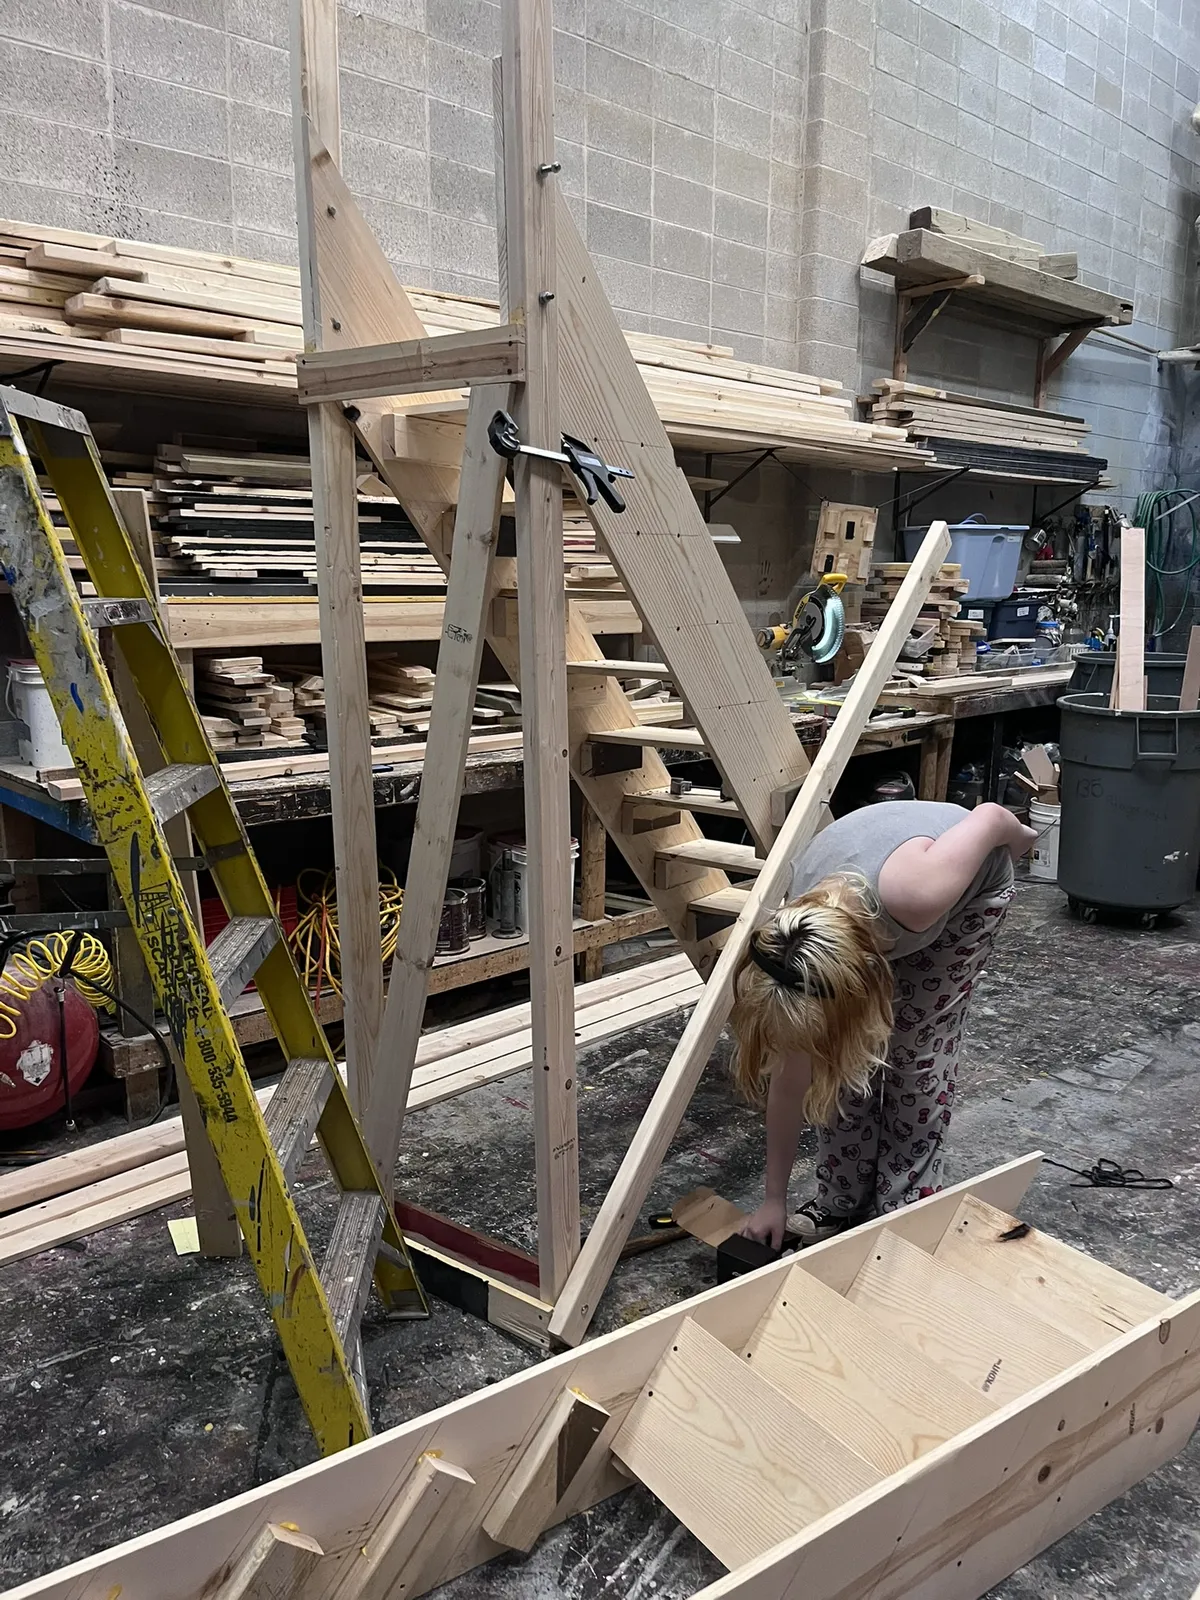
Building Ship Ladder Escape Stairs With Student Crews
Building Ship Ladder Escape Stairs With Student Crews
Every theater teacher knows the moment: your director falls in love with a set design that includes a platform, and suddenly you need a way to get performers up to it, backstage, in a wing space that's roughly the size of a hallway closet. That's exactly why ship ladder stairs exist, and it's why they've become one of my favorite builds to do with students.
A ship ladder is a steep, compact staircase, think of the stairs going up to an attic. Because they sit at a steeper angle than a standard stair, they take up far less floor space, which makes them perfect for tight backstage areas and quick escapes during a scene change. If you've got actors who need to get off a platform fast and disappear, this is your workhorse.
The Numbers (Because We Always Ask First)
Before anyone asks, yes, this is a genuinely budget-friendly build because they will get used over and over, and yes, students can do it. Here's how it broke down for us:
Cost: About $150 per stair in lumber and materials. That's plain framing lumber, wood glue, screws, and a dozen carriage bolts. No specialty hardware, no welding, no fancy joinery.
Build time: We built two complete stairs in about 5½ hours with rotating student crews of about 4 kids per class period, across 4 class periods. These were not seasoned builders; most of them were stagecraft 1 freshmen.
Footprint: Small enough to tuck into a tight wing. The plans run a 16" wide step, and the rise is comfortable even for nervous climbers.
If you can budget about $300 and a week of class periods, you can put two of these on your deck. And unlike a lot of scenery, escape stairs aren't show-specific, they're stock inventory. Build them once, use them for years. They make an excellent practical class project.
Why This Build Works So Well for Student Crews
“Watch the adult do it" is not a build. That’s a demonstration and it has its place. Almost every step of this project is genuinely student-doable, and the skills it teaches are the real deal: measuring and marking, cutting angles, glue-and-screw assembly, pre-drilling, and bolting. That's a resume of basic scenic construction in one project. If your students are trained on saws (not every school allows this), then your entire build can be done by the class.
What made it work in a rotating-crew setup:
The build splits into clear stations. Cut crew, layout and marking, assembly, then railing and install. When the bell rings, the next group picks up where the last left off.
Nobody needs to be an expert. If a student can operate a drill and follow a line, they can contribute.
It builds visible confidence. There's a specific look a kid gets when they climb a staircase they built with their own hands. That's the good stuff.
The One Fiddly Part
If the build has a bottleneck, it's the step supports, the angled supports that sit under each tread. They're glued and screwed to the stringers, and getting each one seated properly along its line is genuinely fiddly work. Pieces want to slide when you clamp them, and if a support goes on crooked, the tread above it sits crooked too.
We handled it by slowing that step down and letting the more careful students own it. Measure twice, glue once, and check the piece against the line before the screws go in. It's the one place in the build where "close enough" isn't.
Going Wider? What We Learned
The plans run a 16" step, and they note you can widen up to about 18" before you need to add bracing. We built our stair 18" wide and had no step flex at all, even without extra reinforcement. But there's a catch, and it's the kind of thing that only shows up when you do the build:
Step tread selection matters. Our 18" treads were rock solid because we were very careful not to use any tread stock with knots or imperfections that would compromise stability. A clean piece of 1x12 at 18" outperforms a knotty one at 16". So before you decide you need the wide version with extra bracing, sort your lumber first. You may find, like we did, that careful material selection gets you there for less.
(If you do want to go wider still, the plans include a modification for widths up to 24" with an added support under each step.)
A Few Teacher-to-Teacher Notes
Add 10% extra material. Mistakes are part of the learning process, literally. Budget for them.
Plan 3–4x longer than you'd take yourself. My 5½ student-hours would be maybe an hour and a half solo. That's not a bug; the process is the product when you're teaching.
Do the cutting yourself or with your most experienced students if your crews are new; angle cuts on the stringers set up everything that follows.
Nobody steps on them until they're bolted and secured. The plans are explicit about this. Temporary screws hold position; only bolts and proper attachment to the platform make it actor-ready.
The railings do double duty. The railing supports add real rigidity to the stair, so don't think of them as an optional finishing touch.
Want the Full Plans?
This build is one of the build packages from Backstage AIC, the full instruction set includes the materials list, cut list, tools list, step-by-step assembly with diagrams and elevations, safety notes, and modifications for wider steps. It's written for exactly this situation: adults who want to build great theater with students, even if scenic construction isn't their background.
Grab the plans at BackstageAIC.com, and join the Backstage AIC community on Facebook to share your build and ask questions. And if you build these with a student crew, tell me! Share your experience and your success. I want to see what your kids made.